
At Jewelry Exchange Co., we specialize in custom jewelry design. With over 30 years of experience in the industry, we bring a wealth of knowledge to the table while working closely with our customers to bring their vision to life in beautiful and unique pieces of jewelry. Shared below is a step by step view into the custom design process using one of our designs.
CUSTOM DESIGN PROCESS
Initial Consultation and Sketch
We begin the custom design process during an initial meeting in our showroom. The customer can either verbally describe their vision or show us pictures of pieces they like. From there, we will work with them to create a sketch of what they are envisioning for the finished product.

CAD Renderings
From the sketches, a CAD rendering will be designed showing different angles of the piece. This is done to show a 3D view of the actual design. The customer sees these renderings, they can provide feedback, as this is the stage that tweaks can still be made. Once the CAD rendering is fine tuned, the customer will give approval to move forward with the production of the design.

Wax Model of the CAD Rendering
From the approved CAD rendering, a wax model is printed.

Silver Casting of CAD Wax Model
The wax that is printed from the CAD rendering is then cast into silver.

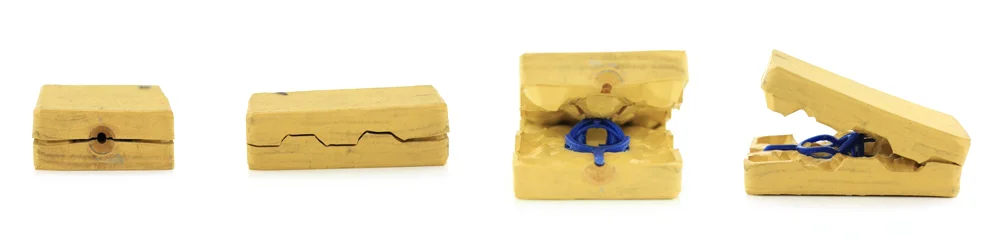
Rubber Mold
Using the silver model, a rubber mold impression is made. The rubber mold is injected with wax which is used to cast the finished product.
Final Casting
Using the wax model from the rubber impression, the final piece is cast in the desired metal (gold, white gold, or platinum).

Finished Product
Once the finished piece is cast in the actual metal of choice, the piece is hand finished and sent to the diamond setter for diamonds to be set. Van meticulously picks each and every diamond or gemstone himself.
